CML self-hosted runners on demand with GPUs
Training models often requires special hardware, like extra memory or GPUs. How can we make a CI/CD pipeline with this hardware? Find out how to set up your own self-hosted runners on-demand with GPUs for fast training.


When creating your CI/CD workflow for a machine learning (ML) project, you might find that by default, neither GitHub Actions nor GitLab CI provides the computing capabilities you need- like GPUs, high memory instances, or multiple cores.
To overcome this hardware hurdle, one practical approach is to use self-hosted runners: runners that you manage, but are accessible to your CI/CD system for executing jobs. It could be an EC2 instance or the GPU under your desk. In our recently-released project, Continuous Machine Learning (CML), our Docker image acts as a thin wrapper over GitLab and GitHub runners, adding some extra capabilities.
Here are some benefits of using CML with a self-hosted runner:
-
Easy to use. Working the same way for both GitLab and GitHub.
-
Get out of dependency hell. We tend to install packages (on top of packages, on top of packages…) while we‘re experimenting with models. In ML in particular, we can be dependent on drivers AND libraries, and sometimes precise versions of them (CUDA and TensorFlow, anyone?). Your CI workflow will install all the dependencies in the containerised runner leaving your machine always clean.
-
Security. If your repo is public your runners could be accessed by anyone that could add scripts that exploits your machine. With the containerised runner you are restricting the access to your real machine.
-
Gain reproducibility. One of the biggest technical debts in the ML space is reproducibility. A few weeks post-experiment, we often discover that trying to put your model back in shape is a pain. Looking at our repo, it’s not obvious what data or training infrastructure or dependencies went into a given result. When you move your ML experiments into a CI/CD system you are making a contract of the dependencies and hardware used for your experiment. Having that contract isolated by the containerised runner, your experiment is perfectly reproducible by anyone in the future.
Hands on GPU Self-hosted runners 101
1) Install nvidia drivers and nvidia-docker in your machine (ubuntu 18.04)
$ curl -s -L https://nvidia.GitHub.io/nvidia-docker/gpgkey | sudo apt-key add - && \
curl -s -L https://nvidia.GitHub.io/nvidia-docker/ubuntu18.04/nvidia-docker.list | sudo tee /etc/apt/sources.list.d/nvidia-docker.list && \
sudo apt update && sudo apt install -y ubuntu-drivers-common && \
sudo ubuntu-drivers autoinstall && \
sudo apt install -y nvidia-container-toolkit && \
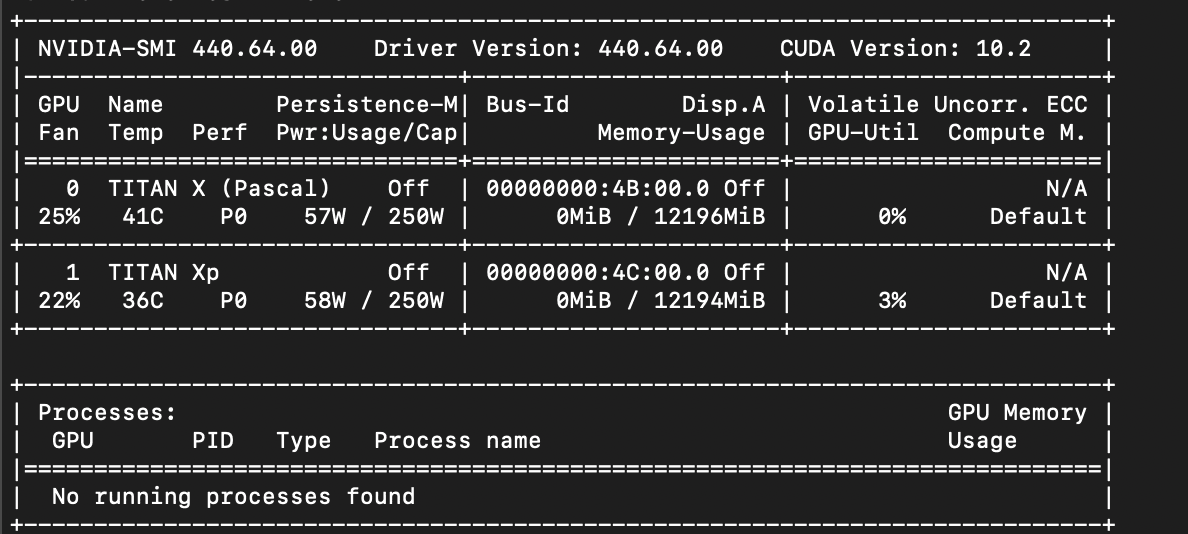
sudo systemctl restart dockerYou can test that your gpus are up and running with the following command:
$ docker run --gpus all iterativeai/cml:0-dvc2-base1-gpu nvidia-smiWe should see something like this:
2) Start your self-hosted runner
With CML docker images launching your own self-hosted runner is very easy. These images have CML and DVC preinstalled (among other perks), plus CUDA drivers. That's all. You can clone these images and add your own dependencies to better mimic your own production environment.
$ docker run --name myrunner -d --gpus all \
    -e RUNNER_IDLE_TIMEOUT=1800 \
    -e RUNNER_LABELS=cml,gpu \
    -e RUNNER_REPO=$my_repo_url \
    -e repo_token=$my_repo_token \
    iterativeai/cml:0-dvc2-base1-gpu runner
where:
RUNNER_IDLE_TIMEOUT is the time in seconds that the runner is going to be idle
at most waiting for jobs to come, if no one comes the runner shuts down and
unregisters from your repo.
RUNNER_LABELS a comma delimited list of labels that we are setting in our
workflow that the jobs will wait for.
RUNNER_REPO is the url of your GitLab or GitHub repo. repo_token is the
personal token generated for your GitHub or GitLab repo. Note that for GitHub
you must check workflow along with repo.
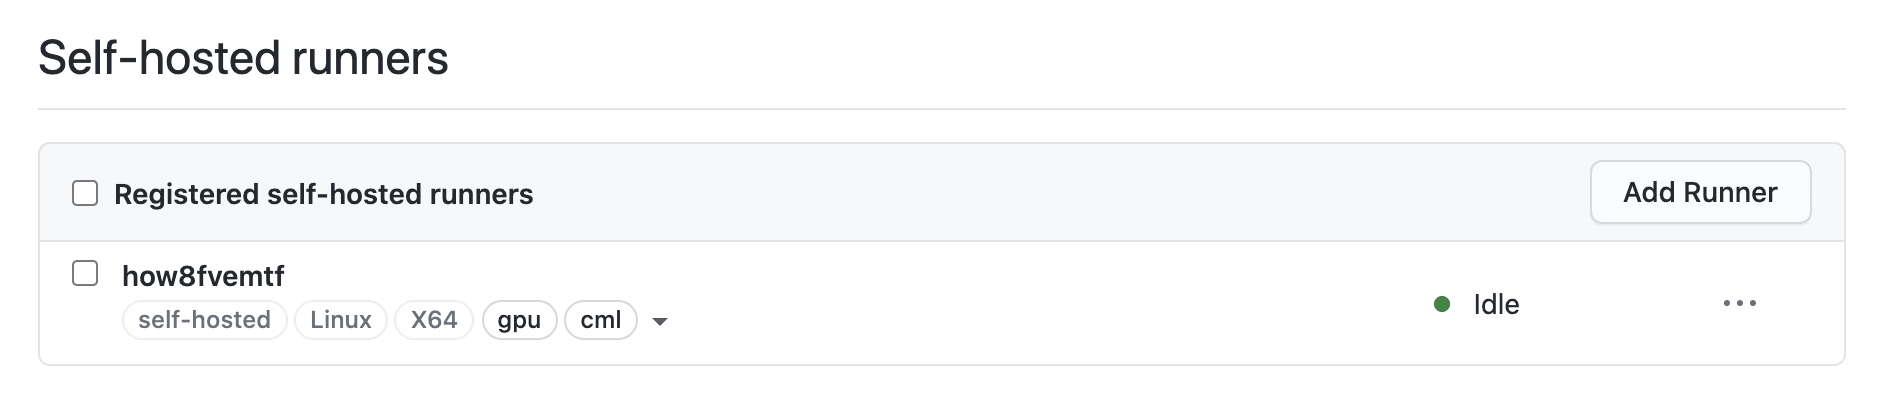
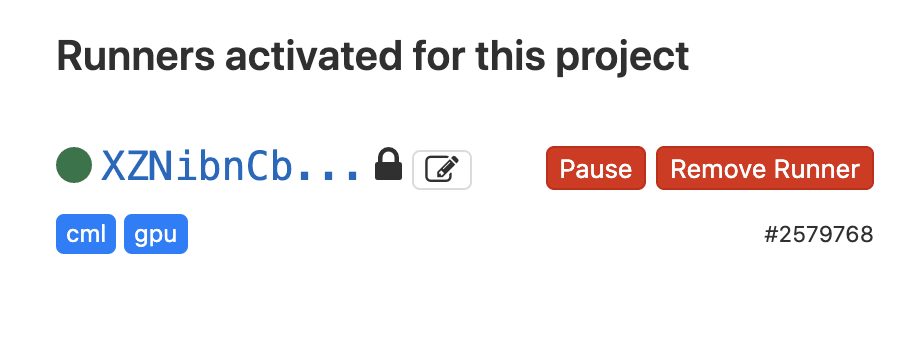
If everything went fine we should see a runner registered in our repo.
3) Setup your GitHub Actions or GitLab workflow yaml file to use the runner and commit your changes.
GitLab
train:
  tags:
    - cml
    - gpu
  script:
    - echo 'Hi from CML!' >> report.md
    - cml send-comment report.md
GitHub
name: train-my-model
on: [push]
jobs:
  train:
    runs-on: [self-hosted, cml, gpu]
    steps:
      - uses: actions/checkout@v2
      - name: cml_run
        run: |
          echo 'Hi from CML!' >> report.md
          cml send-comment report.md
Congrats! At this point you have done all the steps to have your GPUs up and running with CML.
Limitations and future directions
There are still some limitations to be solved at this stage:
-
GitHub Actions can’t run a workflow longer than 72 hours.
-
Self-hosted runners don’t behave well when they disconnect from the repo, limiting the possibilities with preemptible instances (also known as spot instances).
We’re working on these issues (see issues #161, #174, and #208) both in terms of CML and DVC capabilities. So keep watching this space for updates!
We started CML to help teams deal with the complexity of ML more effectively- continuous integration is a proven approach to keeping projects agile even as the team size, number of experiments, and number of dependencies increase. Treating experiments like potential new features in a software project opens up many possibilities for improving our engineering practices. We’re looking forward to an era when ML experiments can be created, logged, and merged into production-ready code in minutes, not days or weeks.