CML Pre-Release Notes: Automatically Train Models in the Cloud with CML 0.3.0
New features are here to make launching cloud compute for continuous integration workflows shorter, sweeter and easier than ever. Plus, a new GitHub Action to setup CML means more ways to use CML without our Docker container.


Today, we're pre-releasing some new features in Continuous Machine Learning, or CML—our open source project to adapt popular continuous integration (CI) systems like GitHub Actions and GitLab CI for data science. CML has become a popular tool for auto-generating ML model reports right in a GitHub Pull Request and orchestrating resources for training models in the cloud.
Here's what's in today's pre-release:
Brand new method to provision cloud compute for your CI workflows
After the initial CML release, we found ways to significantly simplify the
process of allocating resources in CI/CD. We developed a brand new CML command
cml runner that hides much of the complexity of configuring and provisioning
an instance, keeping your workflows free of bash scripting clutter (until the
official release, docs are
in development here).
The new approach uses Terraform provider under the hood instead of Docker
Machine, as in the first version.
Check out this example workflow to launch an EC2 instance from a GitHub Action workflow and then train a model. We hope you'll agree it's shorter, sweeter, and more powerful than ever!
name: 'Train in the cloud'
on: [push]

jobs:
  deploy-runner:
    runs-on: [ubuntu-latest]
    steps:
      - uses: iterative/setup-cml@v1
      - uses: actions/checkout@v2
      - name: deploy
        shell: bash
        env:
          repo_token: ${{ secrets.PERSONAL_ACCESS_TOKEN }}
          AWS_ACCESS_KEY_ID: ${{ secrets.AWS_ACCESS_KEY_ID }}
          AWS_SECRET_ACCESS_KEY: ${{ secrets.AWS_SECRET_ACCESS_KEY }}
        run: |
          cml runner \
          --cloud aws \
          --cloud-region us-west \
          --cloud-type=t2.micro \
          --labels=cml-runner
  train-model:
    needs: deploy-runner
    runs-on: [self-hosted, cml-runner]
    steps:
      - uses: actions/checkout@v2
      - uses: actions/setup-python@v2
        with:
          python-version: '3.x'
      - name: 'Train my model'
        run: |
          pip install -r requirements.txt
          python train.py
If you use CML functions in the train-model step, you can go even further and
get a closed loop—sending model training results from the EC2 instance to your
pull request or merge request! For example, if we expand the train-model step
to incorporate functions like cml publish and cml send-comment:
train-model:
  needs: deploy-runner
  runs-on: [self-hosted, cml-runner]
  container: docker://dvcorg/cml
  steps:
    - uses: actions/checkout@v2
    - uses: actions/setup-python@v2
      with:
        python-version: '3.x'
    - name: 'Train a model'
      env:
        repo_token: ${{ secrets.PERSONAL_ACCESS_TOKEN }}
      run: |
        pip install -r requirements.txt
        python train.py

        echo "## Report from your EC2 Instance" > report.md
        cat metrics.txt >> report.md
        cml publish "plot.png" --md >> report.md
        cml send-comment report.md
You'll get a pull request that looks something like this:
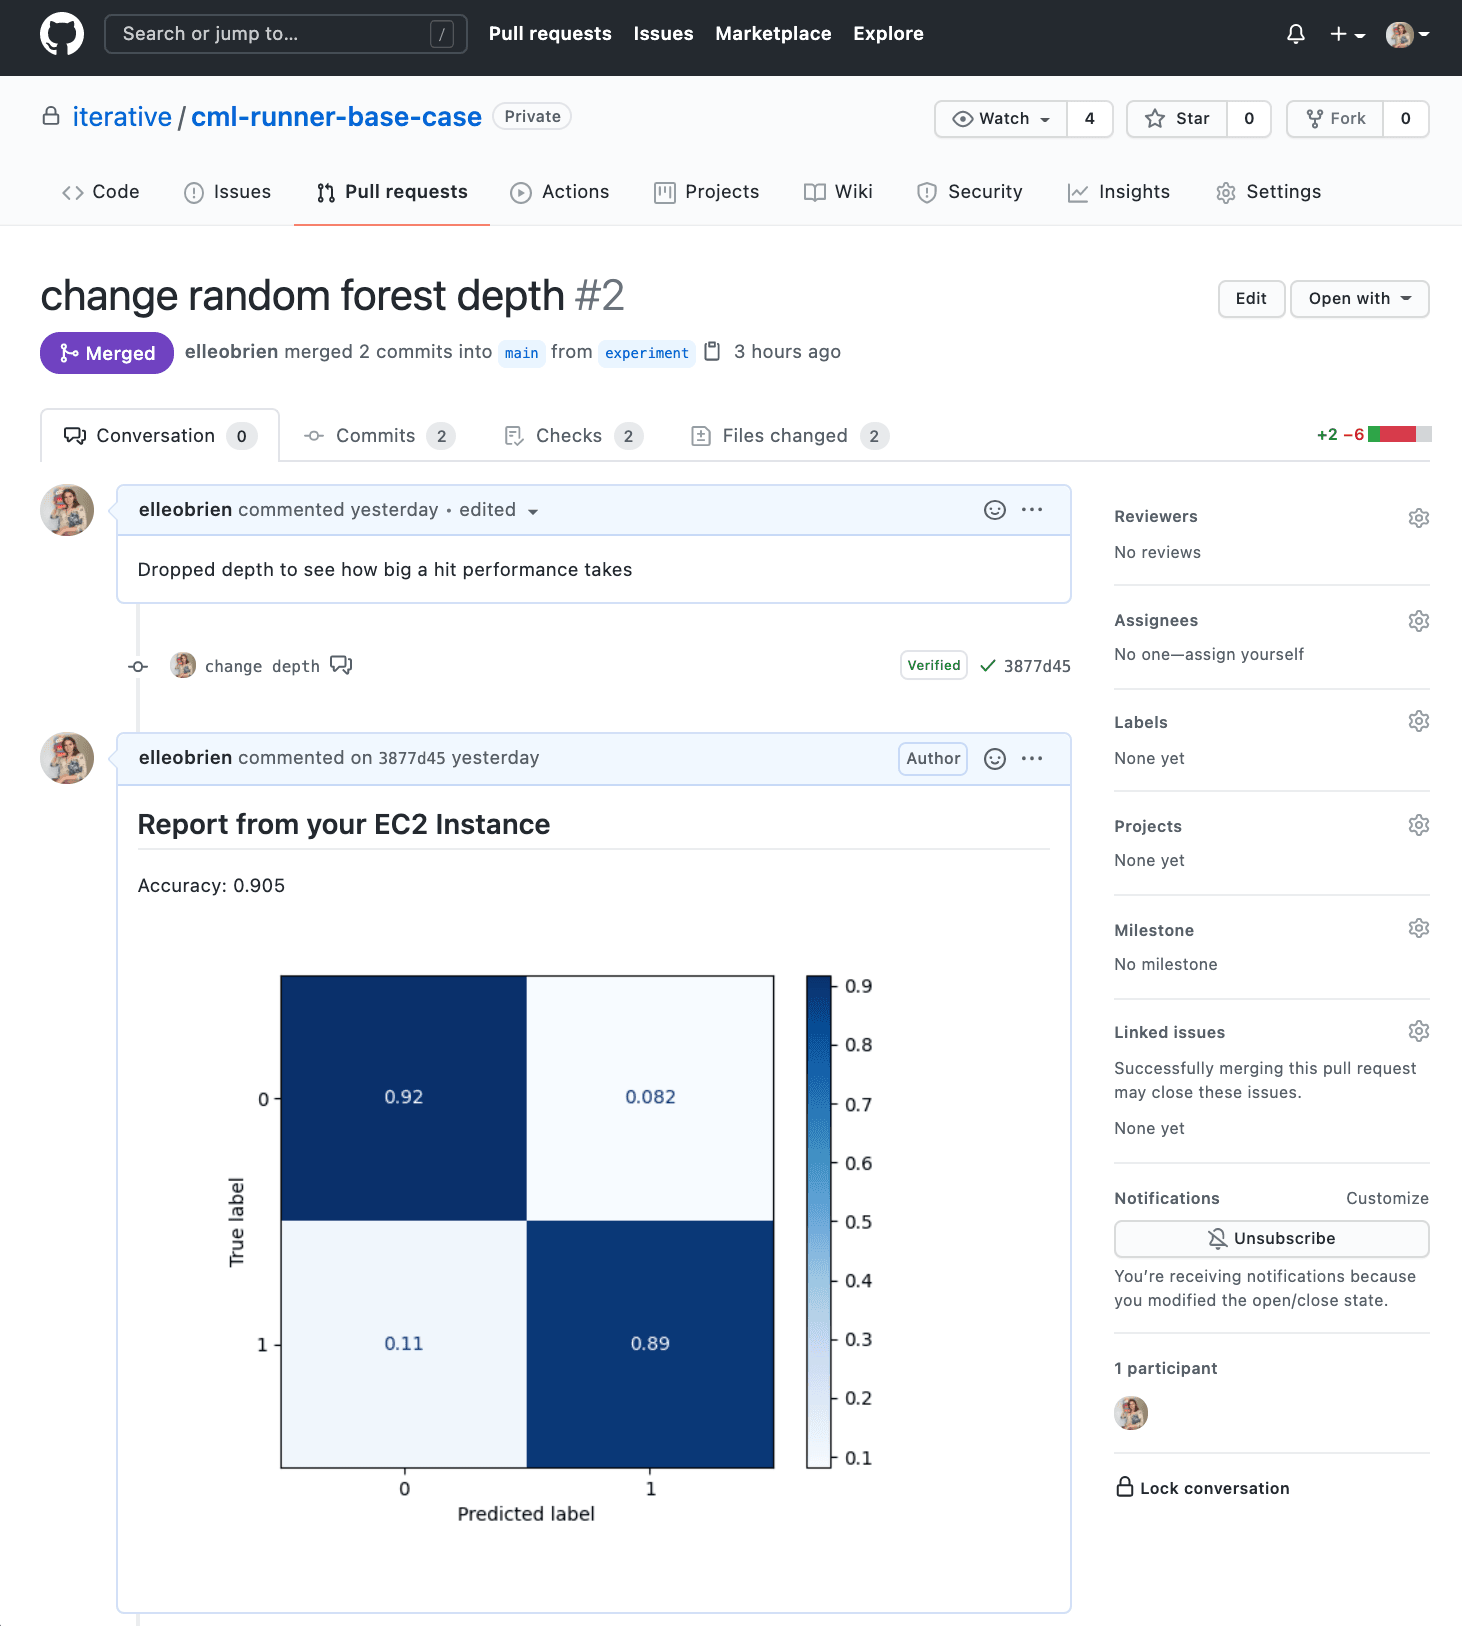
All the code to replicate this example is up on a brand new demo repository.
Our favorite details
The new cml runner function lets you turn on instances, including GPU,
high-memory and spot instances, and kick off a new workflow using the hardware
and environment of your choice—and of course, it'll turn off those instances
after a configurable timeout! In the first CML release, this took
more than 30 lines of code
to configure. Now it's just one function.
Another highlight: you can use whatever Docker container you'd like on your instance. In the above example, we use our custom CML Docker container (because we like it!)—but you certainly don't have to! Whatever image you choose, we highly recommend containerizing your environment for ultimate reproducibility and security with CML.
You can also use the new cml runner function to set up a
local self-hosted runner.
On your local machine or on-premise GPU cluster, you'll install CML as a package
and then run:
$ cml runner \
    --repo $your_project_repository_url \
    --token=$personal_access_token \
    --labels tf \
    --idle-timeout 180
Now your machine will be listening for workflows from your project repository.
A New GitHub Action
One more thing: you might've noticed in our example workflow above that there's a new CML GitHub Action! The new Action helps you setup CML, giving you one more way to mix and match the CML suite of functions with your preferred environment.
The new Action is designed to be a straightforward, all-in-one install that
gives you immediate use of functions like cml publish and cml runner. You'll
add this step to your workflow:
steps:
  - uses: actions/checkout@v2
- uses: iterative/setup-cml@v1Get ready for the release
We're inviting our community members to explore these new features in anticipation of our upcoming, official release. As always, feedback is welcome by opening an issue on the CML GitHub repository, as a comment here or via our Discord channel. We're excited to hear what you think!